


1. Introduction: Why Build a Budget Greenhouse?
A greenhouse is a game-changer for gardeners. Whether you’re looking to grow fresh vegetables year-round, protect plants from extreme weather, or start seedlings early, having a greenhouse can significantly improve your gardening success.
Many people assume that greenhouses are expensive, but that’s a myth! With the right approach, you can build a fully functional greenhouse on a budget using low-cost materials and smart design choices.
This guide will cover everything you need, from choosing the best affordable greenhouse style to a step-by-step construction process, along with Aosom’s budget-friendly greenhouse kits that save time and money while ensuring durability.
2. Choosing the Right Type of Affordable Greenhouse
Before you start building, you need to select the right greenhouse design for your needs, space, and budget. Below is a comparison of the most cost-effective greenhouse styles and their advantages:
| Greenhouse Type | Pros | Estimated Cost |
| Hoop House (PVC & Plastic Sheeting) | Very affordable, easy to assemble, lightweight | $100–$300 |
| Cold Frame | Ideal for small gardens, great for overwintering plants | $50–$200 |
| Recycled Window Greenhouse | Eco-friendly, aesthetically pleasing, sturdy | $150–$500 |
| Wood Frame Greenhouse | Durable, can be built with reclaimed wood | $300–$800 |
🔹 Best Budget Greenhouse Kit Alternative: If you're looking for a quick, reliable option, consider the Outsunny 6' x 3' x 5' Portable Walk-in Greenhouse—an affordable, compact, and easy-to-set-up option for home gardening.
![]()
3. Essential Materials & Where to Find Them Cheaply
To build a low-cost greenhouse, focus on affordable and recycled materials that still provide durability:
Frame Materials
- PVC pipes – Cheap, lightweight, and easy to assemble.
- Reclaimed wood – A great option if you can source it for free.
- Metal poles or rebar – More expensive but incredibly durable.
Covering Options
- 6-mil plastic sheeting – Most affordable, but requires replacement every 2-3 years.
- Polycarbonate panels – More expensive but long-lasting and insulating.
- Repurposed glass windows – Free if sourced from old buildings or Craigslist.
Doors & Ventilation
- DIY wooden doors – Use scrap wood and hinges.
- Zippered fabric doors – Available in pre-made greenhouse kits.
- Mesh-covered vents – Essential for airflow and cooling.
Where to Find Materials Cheaply
- Craigslist & Facebook Marketplace – Great for finding free or cheap supplies.
- Habitat for Humanity Restore – Excellent source for used windows, wood, and doors.
- Local construction sites – Often have leftover materials they’re willing to give away.
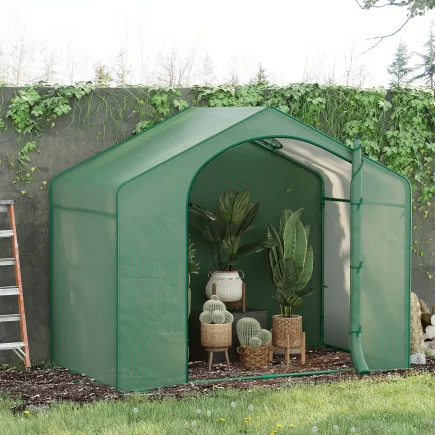
🔹 Affordable Kit Option: If you need a pre-built frame and cover, check out the Outsunny 13' Portable Tunneled Greenhouse—a sturdy, budget-friendly solution with multiple zippered doors for easy access and ventilation.
![]()
4. Step-by-Step Guide to Building a Greenhouse on a Budget
This guide provides a detailed breakdown of how to build an affordable yet functional greenhouse.
Step 1: Choose the Right Location
- Sunlight: Ensure at least 6 hours of direct sunlight daily.
- Drainage: Avoid low-lying areas prone to waterlogging.
- Wind Protection: Place near fences or buildings for added stability.
![]()
Step 2: Build a Sturdy Frame
- PVC frames – Cheapest and easiest to work with.
- Wooden frames – More durable, especially if using reclaimed wood.
- Metal frames – Long-lasting but requires more tools for cutting and welding.
![]()
Step 3: Secure the Covering
- Attach plastic sheeting with clamps for easy adjustments.
- Use zip ties to hold polycarbonate panels in place.
- Seal edges tightly to prevent heat loss in winter.
![]()
Step 4: Add a Door & Ventilation System
- Hinged wooden doors provide strong protection.
- Roll-up fabric doors like those in Aosom’s mini greenhouses offer easy access.
- Side vents & mesh openings help control temperature and humidity.
![]()
Step 5: Insulating & Heating on a Budget
- Use bubble wrap to insulate walls.
- Compost piles generate heat naturally and help maintain temperature.
- Paint black water barrels to store and release heat at night.
🔹 Tip: The Outsunny 10' x 5' x 7' Walk-In Greenhouse comes with built-in shelves and a durable PE cover, providing better insulation and stability for year-round growing.
![]()
5. Cost Breakdown: DIY vs. Pre-Made Greenhouses
| Greenhouse Type | DIY Cost | Pre-Made Kit Cost |
| PVC Hoop House | $100 – $300 | $400 – $900 |
| Recycled Window Greenhouse | $150 – $500 | $600 – $1,500 |
| Wood Frame Greenhouse | $300 – $800 | $700 – $3,000 |
🔹 Want to save time? The Outsunny Raised Garden Flower Bed Kit is a great hybrid option, combining a raised garden bed and protective greenhouse cover for just a fraction of the cost of full-size structures.
6. Structural Stability & Durability: How to Make Your Greenhouse Last Longer
Building a greenhouse on a budget doesn’t mean sacrificing durability. To ensure your greenhouse lasts for years, focus on reinforcing the frame, securing the structure against strong winds, and preparing for extreme weather conditions.
Reinforcing the Frame: How to Make PVC/Wood Frames Stronger
- Use additional cross-bracing: If you’re building a PVC hoop house or a wood-frame greenhouse, adding diagonal support beams will prevent bending or warping over time.
- Strengthen joints and connections: For PVC frames, use T-joints and elbow connectors instead of simple zip ties. For wooden structures, use corner braces and screws instead of nails for added stability.
- Apply weatherproofing treatment: If using wood, coat it with a weather-resistant sealant to prevent rotting and extend its lifespan.
🔹 Tip: The Outsunny 10' x 5' x 7' Walk-In Greenhouse comes with a durable PE cover and built-in steel frame, making it a long-lasting, weather-resistant option for budget-conscious gardeners.
![]()
Anchoring the Greenhouse: Preventing Wind Damage
- Bury the base in the ground: For plastic-covered greenhouses, dig a trench around the perimeter and bury at least 6 inches of the cover to secure it.
- Use ground stakes and guy ropes: Just like securing a camping tent, tie strong ropes or cables from the top of the greenhouse to heavy-duty ground stakes.
Weigh down the frame: Place concrete blocks, bricks, or sandbags around the base to prevent the structure from shifting during storms.
Protecting Against Snow Load: Reinforcing Roof Structures
- Use a sloped or arched roof design to allow snow to slide off easily.
- Regularly remove snow buildup using a soft broom or long-handled brush.
- Reinforce the roof with extra support beams if you live in an area with heavy snowfall.
7. Climate Control & Ventilation on a Budget
Maintaining a stable temperature and airflow inside your greenhouse is essential for healthy plant growth. Here’s how to control heat, prevent overheating, and keep your greenhouse warm in winter—all without spending a fortune.
DIY Ventilation Techniques: Using Windows, Mesh Covers, and DIY Vents
- Install roll-up side vents – Mesh-covered openings on the sides of the greenhouse increase airflow and regulate humidity.
- Use a DIY automatic vent opener – A simple wax-filled piston device can be attached to greenhouse vents to automatically open and close them based on temperature.
- Place fans strategically – Battery-powered or solar fans help circulate air inside.
🔹 Best Budget-Friendly Ventilation Solution: The Outsunny 6' x 3' x 3' Mini Greenhouse has built-in ventilation panels to regulate airflow efficiently.
![]()
Budget-Friendly Heating Solutions: Compost Heating, Black Barrels, and Mulch Insulation
- Use compost as a natural heat source – Placing a compost pile inside or next to your greenhouse helps generate natural warmth in colder months.
- Black water barrels for heat retention – Fill 55-gallon barrels with water and paint them black to absorb heat during the day and release it at night.
Mulch insulation for plant beds – Covering the soil with straw, leaves, or wood chips traps heat and keeps the ground warmer in winter.
Cooling Strategies in Hot Climates: Shade Cloth, Cross-Ventilation, and Misting Systems
- Use shade cloths – A 30%-50% shade cloth draped over the greenhouse reduces excessive heat.
- Create cross-ventilation – Open opposite vents and doors to allow natural airflow.
DIY misting system – A simple drip irrigation system with fine nozzles can keep plants cool by releasing a fine mist during hot days.
8. Expanding & Customizing Your Greenhouse Over Time
A great advantage of building a greenhouse yourself is the ability to expand and customize it later. Instead of investing in an oversized greenhouse from the start, start small and upgrade as needed.
How to Design a Modular Greenhouse That Grows with Your Needs
- Use extendable PVC or wood panels – Design your greenhouse so that additional sections can be added later.
- Modular shelving and raised beds – Invest in stackable shelves and expandable plant beds that can be adjusted over time.
- Portable greenhouses for seasonal flexibility – If you move houses often or have limited space, a mini walk-in greenhouse might be a better option than a permanent structure.
🔹 Best Expandable Greenhouse Option: The Outsunny 5' x 2.5' x 6.5' Mini Walk-in Greenhouse Kit has stackable shelves, a roll-up door, and a weatherized plastic cover, making it an excellent option for small spaces that need future expansion.
Adding Shelves and Trellises for Vertical Gardening
- Hanging baskets for lightweight plants – Maximize space by hanging planters from the ceiling or frame.
- Wall-mounted trellises for climbing plants – Grow vining plants like cucumbers and beans upward instead of spreading them on the ground.
- Rolling shelf carts – Use movable shelving units to rearrange plants as needed.
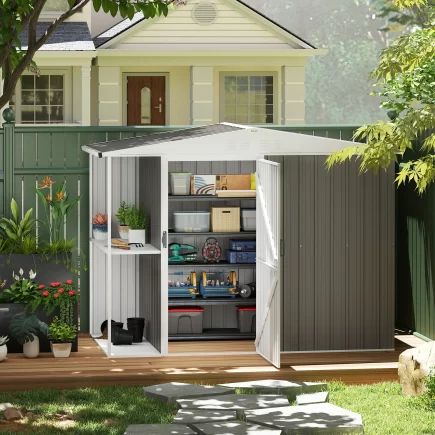
Making It Multi-Purpose – Use as a Shed or Workspace
- Storage for gardening tools – Install small hooks and shelves inside the greenhouse.
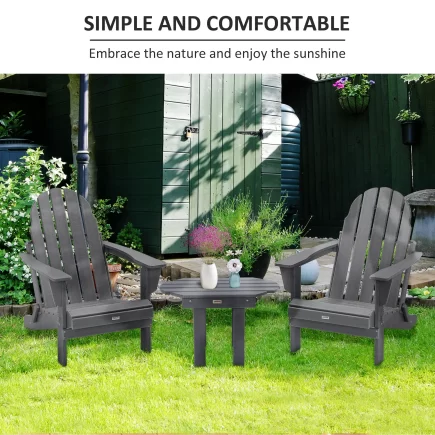
- Combination greenhouse and outdoor lounge – Add a small seating area for relaxing while gardening.
- Dual-use for hydroponics – Greenhouses can be modified for hydroponic gardening with simple grow trays and water reservoirs.
9. Common Mistakes to Avoid
Even experienced DIYers make mistakes when building a greenhouse. Here are some of the biggest mistakes to watch out for and how to avoid them:
- Choosing a poor location – Avoid shaded areas and ensure proper drainage.
- Skipping insulation – Even budget greenhouses need proper insulation to retain heat.
- Using thin plastic sheeting – Opt for at least 6-mil UV-resistant plastic to prevent tearing.
- Ignoring ventilation needs – Install DIY venting solutions like mesh panels and roll-up doors.
10. Sustainable & Eco-Friendly Greenhouse Techniques
As gardeners become more environmentally conscious, sustainable greenhouse techniques are growing in popularity. A budget-friendly greenhouse doesn’t have to compromise on eco-friendly features—in fact, using recycled materials and energy-efficient systems can make your greenhouse both affordable and environmentally responsible.
Solar-Powered Greenhouse Solutions (Heating & Lighting)
- Solar panels for greenhouse heating – Installing a small solar panel system can power greenhouse fans, heating lamps, or water pumps without adding to your electricity bill.
- DIY solar heating – Place black-painted water barrels inside the greenhouse to absorb solar heat during the day and release it at night.
- Solar-powered LED grow lights – If you need extra light for plants, opt for solar LED lamps instead of expensive electrical grow lights.
🔹 Best Solar-Ready Greenhouse: The Outsunny 19.7' x 9.8' x 6.6' Heavy-Duty Greenhouse Cover provides ample sunlight penetration, making it ideal for solar heating techniques.
Rainwater Harvesting for Irrigation – DIY Setup
- Install a rainwater collection system – Attach gutters and downspouts to collect rainwater and store it in barrels for irrigation.
- Use a gravity-fed drip irrigation system – Simple tubing and valves allow water to flow naturally to plants without using pumps.
- Filter the collected water – A basic mesh filter prevents debris from clogging the system.
Recycled & Upcycled Greenhouse Materials – Ideas for Sustainable Building
- Use old windows for a glass-paneled greenhouse – Salvage windows from old homes or flea markets.
- Build raised garden beds from reclaimed wood – Wooden pallets or shipping crates work well.
- Upcycle plastic bottles into mini greenhouses – Large clear plastic bottles can be cut and placed over individual plants to protect them.
🔹 Tip: The Outsunny Raised Garden Flower Bed Kit is an eco-friendly choice, as it combines a wooden planter with a protective greenhouse cover, optimizing space while maintaining sustainability.
11. Product Recommendations & Budget Solutions
Choosing the right greenhouse kit or accessories can save you time and effort. Here are some top budget-friendly options from Aosom that match DIY greenhouse builders’ needs:
🛒 Best Budget Greenhouse Kits from Aosom – Affordable & Easy to Set Up
- Outsunny 6′ x 3′ x 5′ Portable Walk-in Greenhouse
- Best for small gardens – Provides ample space for plant beds and containers.
- Zippered door & mesh vents for ventilation.
- Steel frame for added stability.
- Outsunny 13′ Portable Tunnel Greenhouse
- Budget-friendly hoop house option.
- Four zippered doors for easy access and airflow control.
- Water & UV-resistant PVC cover for long-lasting use.
- Outsunny 10′ x 5′ x 7′ Walk-In Greenhouse
- Best for expanding greenhouses over time.
- Built-in shelving for organizing plants.
- Durable frame and zippered doors for accessibility.
🛒 Essential Greenhouse Accessories for Budget-Conscious Growers
- Outsunny Mini Walk-in Greenhouse with Shelves – Compact yet spacious for organizing plants on multiple levels.
- Outsunny Heavy-Duty Plastic Greenhouse Cover – Replacement cover for any DIY frame, with reinforced UV-protection to prevent overheating.
- Raised garden beds – Aosom’s raised bed kits combine planters and cold frames, making them perfect for small greenhouses.
12. Conclusion: Start Your DIY Greenhouse Today!
Building a greenhouse doesn’t have to be expensive. Whether you opt for a fully DIY greenhouse using PVC pipes and recycled materials, or go for an affordable pre-built Aosom greenhouse kit, the key is to start with what works best for your space and budget.
Key Takeaways:
- Choose the right greenhouse type – A hoop house, cold frame, or recycled window greenhouse are the best low-cost options.
- Use affordable and sustainable materials – Look for PVC, wood, repurposed glass, and 6-mil plastic sheeting to keep costs low.
- Follow a step-by-step building guide – Focus on location, frame stability, insulation, and ventilation for long-term success.
- Consider budget-friendly greenhouse kits – Aosom offers affordable walk-in and tunnel greenhouses that save time while providing excellent plant protection.
Final Tip: Start small and expand later! Instead of investing in a large greenhouse upfront, begin with a basic structure and add upgrades over time as your gardening needs grow.
Are you ready to build your own budget greenhouse? Explore Aosom’s Affordable Greenhouse Collection and find the perfect kit to kickstart your gardening journey without breaking the bank!
FAQs
Absolutely! Many gardeners repurpose old windows, pallets, or even plastic bottles to build eco-friendly and budget-conscious greenhouses. These materials not only save money but also reduce environmental impact.
A greenhouse stays warm in winter by trapping sunlight that passes through its glazing, typically glass or plastic. The absorbed sunlight heats the plants and soil, gradually raising the interior temperature. This natural solar heating helps maintain a stable environment, allowing plants to thrive even in colder months.
The choice between glass and plastic for a greenhouse depends on your needs. Polycarbonate is lightweight, durable, and shatterproof, making it a budget-friendly and low-maintenance option. Glass, on the other hand, offers superior clarity, energy efficiency, and a classic aesthetic, but it is heavier and more fragile. If affordability and durability are your top priorities, go with polycarbonate. For a long-lasting, visually appealing, and eco-friendly greenhouse, glass is the better choice.
The ideal location for a greenhouse depends on its intended use. For year-round gardening, position the ridge east-west to maximize sunlight exposure throughout the day. If using it mainly in spring and summer, a north-south orientation ensures even light distribution on both sides. For lean-to greenhouses, the best placement is south-facing, with the supporting wall on the north side to retain heat and provide stability.
A small to medium-sized greenhouse (around 6×8 feet) is ideal for budget-conscious projects. This size provides ample growing space while keeping material costs low and making construction manageable.